Set up the desktop server (using desktop app)
Figma provides the local desktop version of the Figma MCP server for some specific organization and enterprise use cases, but we strongly recommend using the remote version of the Figma MCP server. The remote version of the server provides the broadest set of features.
You can only use the desktop MCP server via the Figma desktop app. Download the Figma desktop app →
You must use a code editor or application that supports MCP servers, such as VS Code, Cursor, Claude Code. For a complete list of supported clients, see the MCP catalog.
Step 1: Enable the desktop MCP Server
- Open the Figma desktop app and make sure you've updated to the latest version.
- Create or open a Figma Design file.
- In the toolbar at the bottom, toggle to Dev Mode or use the keyboard shortcut ShiftD
- In the MCP server section of the inspect panel, click Enable desktop MCP server.
You should see a confirmation message at the bottom of the screen letting you know the server is enabled and running.
Note: The desktop server runs locally at http://127.0.0.1:3845/mcp. Keep this address handy for your configuration file in the next step.
Step 2: Set up your MCP client
Once the server is running locally on the Figma desktop app, MCP clients will be able to connect to your server. Follow the instructions for your specific client to add the MCP server.
VS Code
-
Use the shortcut ⌘ Shift P to search for
MCP:Add Server. -
Select
HTTP. -
Past the server url
http://127.0.0.1:3845/mcpin the search bar, then hit Enter. -
Type in
figma-desktopwhen it asks for a Server ID, then hit Enter. -
Select whether you want to add this server globally or only for the current workspace. Once confirmed, you'll see a configuration like this in your
mcp.jsonfile:{ "servers": { "figma-desktop": { "type": "http", "url": "http://127.0.0.1:3845/mcp" } } } -
Open the chat toolbar using ⌥⌘B or ⌃⌘I and switch to Agent mode.
-
With the chat open, type in
#get_design_contextto confirm that the MCP server tools are available. If no tools are listed, restart the Figma desktop app and VS Code.
Note: You must have GitHub Copilot enabled on your account to use MCP in VS Code.
For more information, see VS Code's official documentation.
Cursor
-
Open Cursor → Settings → Cursor Settings.
-
Go to the MCP tab.
-
Click + Add new global MCP server.
-
Enter the following configuration and save:
{
   "mcpServers": {
     "figma-desktop": {
       "url": "http://127.0.0.1:3845/mcp"
     }
   }
 }
For more information, see Cursor's official documentation.
Claude Code
- Open your terminal and run:
claude mcp add --transport http figma-desktop http://127.0.0.1:3845/mcp
-
Use the following commands to check MCP settings and manage servers:
- List all configured servers
claude mcp list
- Get details for a specific server
claude mcp get my-server
- Remove a server
claude mcp remove my-server
For more information, see Anthropic's official documentation.
Other editors
You can manually add the MCP server using this configuration:
{
  "mcpServers": {
    "figma-desktop": {
      "url": "http://127.0.0.1:3845/mcp"
    }
  }
}
Once configured, refresh or start the server. You should see a successful connection and the available tools. If the connection failed or you do not see any tools, double check that the server is active in the Figma desktop app.
Step 3: Prompt your MCP client
The MCP server introduces a set of tools that help LLMs translate designs in Figma. Once connected, you can prompt your MCP client to access a specific design node.
There are two ways to provide Figma design context to your AI client:
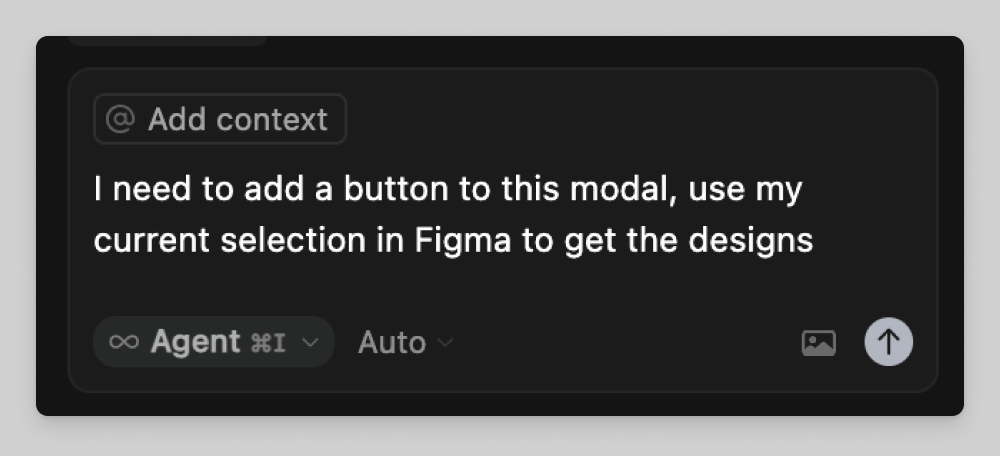
Selection-based
-
Select a frame or layer inside Figma using the desktop app.
-
Prompt your client to help you implement your current selection.
Link-based
-
Copy the link to a frame or layer in Figma.
-
Prompt your client to help you implement the design at the selected URL.
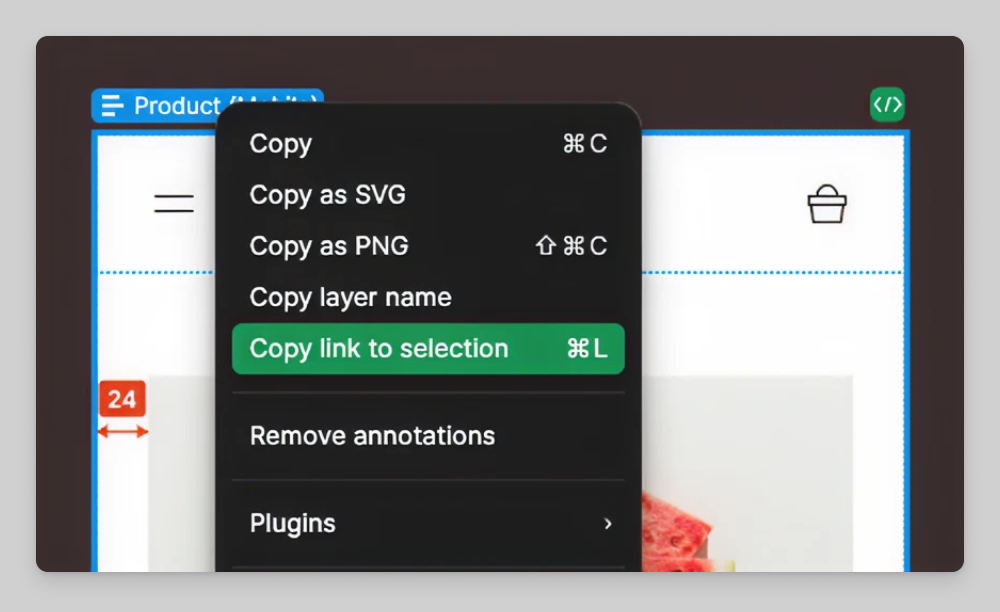
Note: Your client won't be able to navigate to the selected URL, but it will extract the node-id that is required for the MCP server to identify which object to return information about.
Step 4: Tweak your settings
The desktop MCP server has a few settings you can tweak to get it working just as you like it. To find these settings, go the MCP server section of the inspect panel and click the Open settings modal button.
Image settings
Lets you choose how image assets are handled:
- Local server: uses local images, adds a localhost link to the returned markup, allowing you to use the actual image asset wherever your file is rendered.
- Download assets: allow the MCP server to download and write image assets (e.g. icons, images) from Figma into the user's project.
Enable Code Connect
Includes Code Connect mappings in the response, so the generated code can reuse components from your connected codebase where possible.