Getting started with Code Connect CLI
In this guide, we’ll get you set up with Code Connect CLI using template files — the recommended approach for connecting your design components to code. Template files are framework-agnostic and give you full control over the code snippets shown in Figma.
We’ll walk through:
- Install Code Connect CLI
- Configure your project
- Write your first template file
- Publish to Figma
- Next steps
Before you begin
To use this guide, you need a design system codebase that contains components, and a Figma design library (a Figma file that contains your root design system components).
To follow along with the guide, you can optionally use the Simple Design System (SDS) provided by Figma. If you’d like to use the SDS:
- Open the Simple Design System community file in Figma and, when prompted, select Make a copy. The SDS community file contains the design system components.
- Clone the sds repository. The repository contains the code components that you’ll connect to your copy of the SDS file.
Requirements
To install and use Code Connect, you must do the following:
- Install Node.js 18 or newer
- Generate a personal access token with the Code Connect scope set to Write and the File content scope set to Read.
Install the Code Connect command line tool
To use Code Connect, you first need to install the Code Connect command line tool. The command line tool lets you connect, publish, and unpublish your components.
The easiest way to install the command line tool is with Node Package Manager (npm). To install the command line tool, use:
npm install --global @figma/code-connect@latest
Privacy and Code Connect
Figma only collects the minimum data needed to enable Code Connect in the interface. When you run figma connect using the Code Connect command-line interface, Figma gets the following data:
- The paths for components that are added
- The repository URL where the Code Connect components are implemented
- The properties and code in the .figma files
Figma logs only basic events for understanding Code Connect usage: when components are published or unpublished, and calls to get Figma data when using the command-line interface.
For more information about Figma’s approach to privacy, see Figma’s Privacy Policy.
Configure your project
Create a figma.config.json file in the root of your project:
{
  "codeConnect": {
    "include": ["**/*.figma.ts"],
    "label": "React",
    "language": "jsx"
  }
}
The label and language values control how your snippets are labeled in Figma. Change these to match your codebase — for example, use "Swift" and "swift" for a SwiftUI project.
If you’re using TypeScript, add the template type definitions to your tsconfig.json for autocomplete and type checking in template files:
{
  "compilerOptions": {
    "types": ["@figma/code-connect/figma-types"]
  }
}
Write your first template file
Template files connect a Figma component to a code snippet. They use the .figma.ts (or .figma.js) extension and live alongside your code components.
To connect a Figma component:
-
In Figma, right-click on the component and select Copy link to selection to get its URL.
-
Create a
.figma.tsfile for your component. The filename should match your component name, e.g.Button.figma.ts:
// url=https://www.figma.com/file/your-file-id/Button?node-id=123
import figma from 'figma'

const instance = figma.selectedInstance

const label = instance.getString('Label')
const disabled = instance.getBoolean('Disabled')
const size = instance.getEnum('Size', {
  Large: 'large',
  Medium: 'medium',
  Small: 'small',
})

export default {
  example: figma.code`
    <Button size={${size}} disabled={${disabled}}>
      ${label}
    </Button>
  `,
  imports: ['import { Button } from "components/Button"'],
  id: 'button',
}
The file has three main parts:
- Metadata comment (
// url=...): Links this file to a specific Figma component. The URL should point to the component in your design system file (right-click a component in Figma and select Copy link to selection). - Property access: Use methods on
figma.selectedInstanceto read properties from the Figma component and map them to code values. Common methods includegetString,getBoolean,getEnum, andgetInstanceSwap. export default: Defines the code snippet (example), any import statements to display at the top of the snippet, and a uniqueidfor this template.
For the complete template API including all available methods and advanced features, see Writing template files.
Publish Code Connect files
To view the Code Connect snippets for your components in Dev Mode, you need to publish the files first:
- In the root of your repository, run the following command using your personal access token:
npx figma connect publish --token=PERSONAL_ACCESS_TOKEN
Where PERSONAL_ACCESS_TOKEN is the access token for the Figma API that you generated.
Note: Optionally, you can use the FIGMA_ACCESS_TOKEN environment variable to pass your personal access token to the Code Connect command line tool. When using the env variable, you do not have to include --token.
The tool publishes your Code Connect files, returning a list of component names and URLs to the corresponding nodes.
-
To view the mapped components in Figma, click the links in the list after you publish. The links bring you to the corresponding components in your design system Figma file.
-
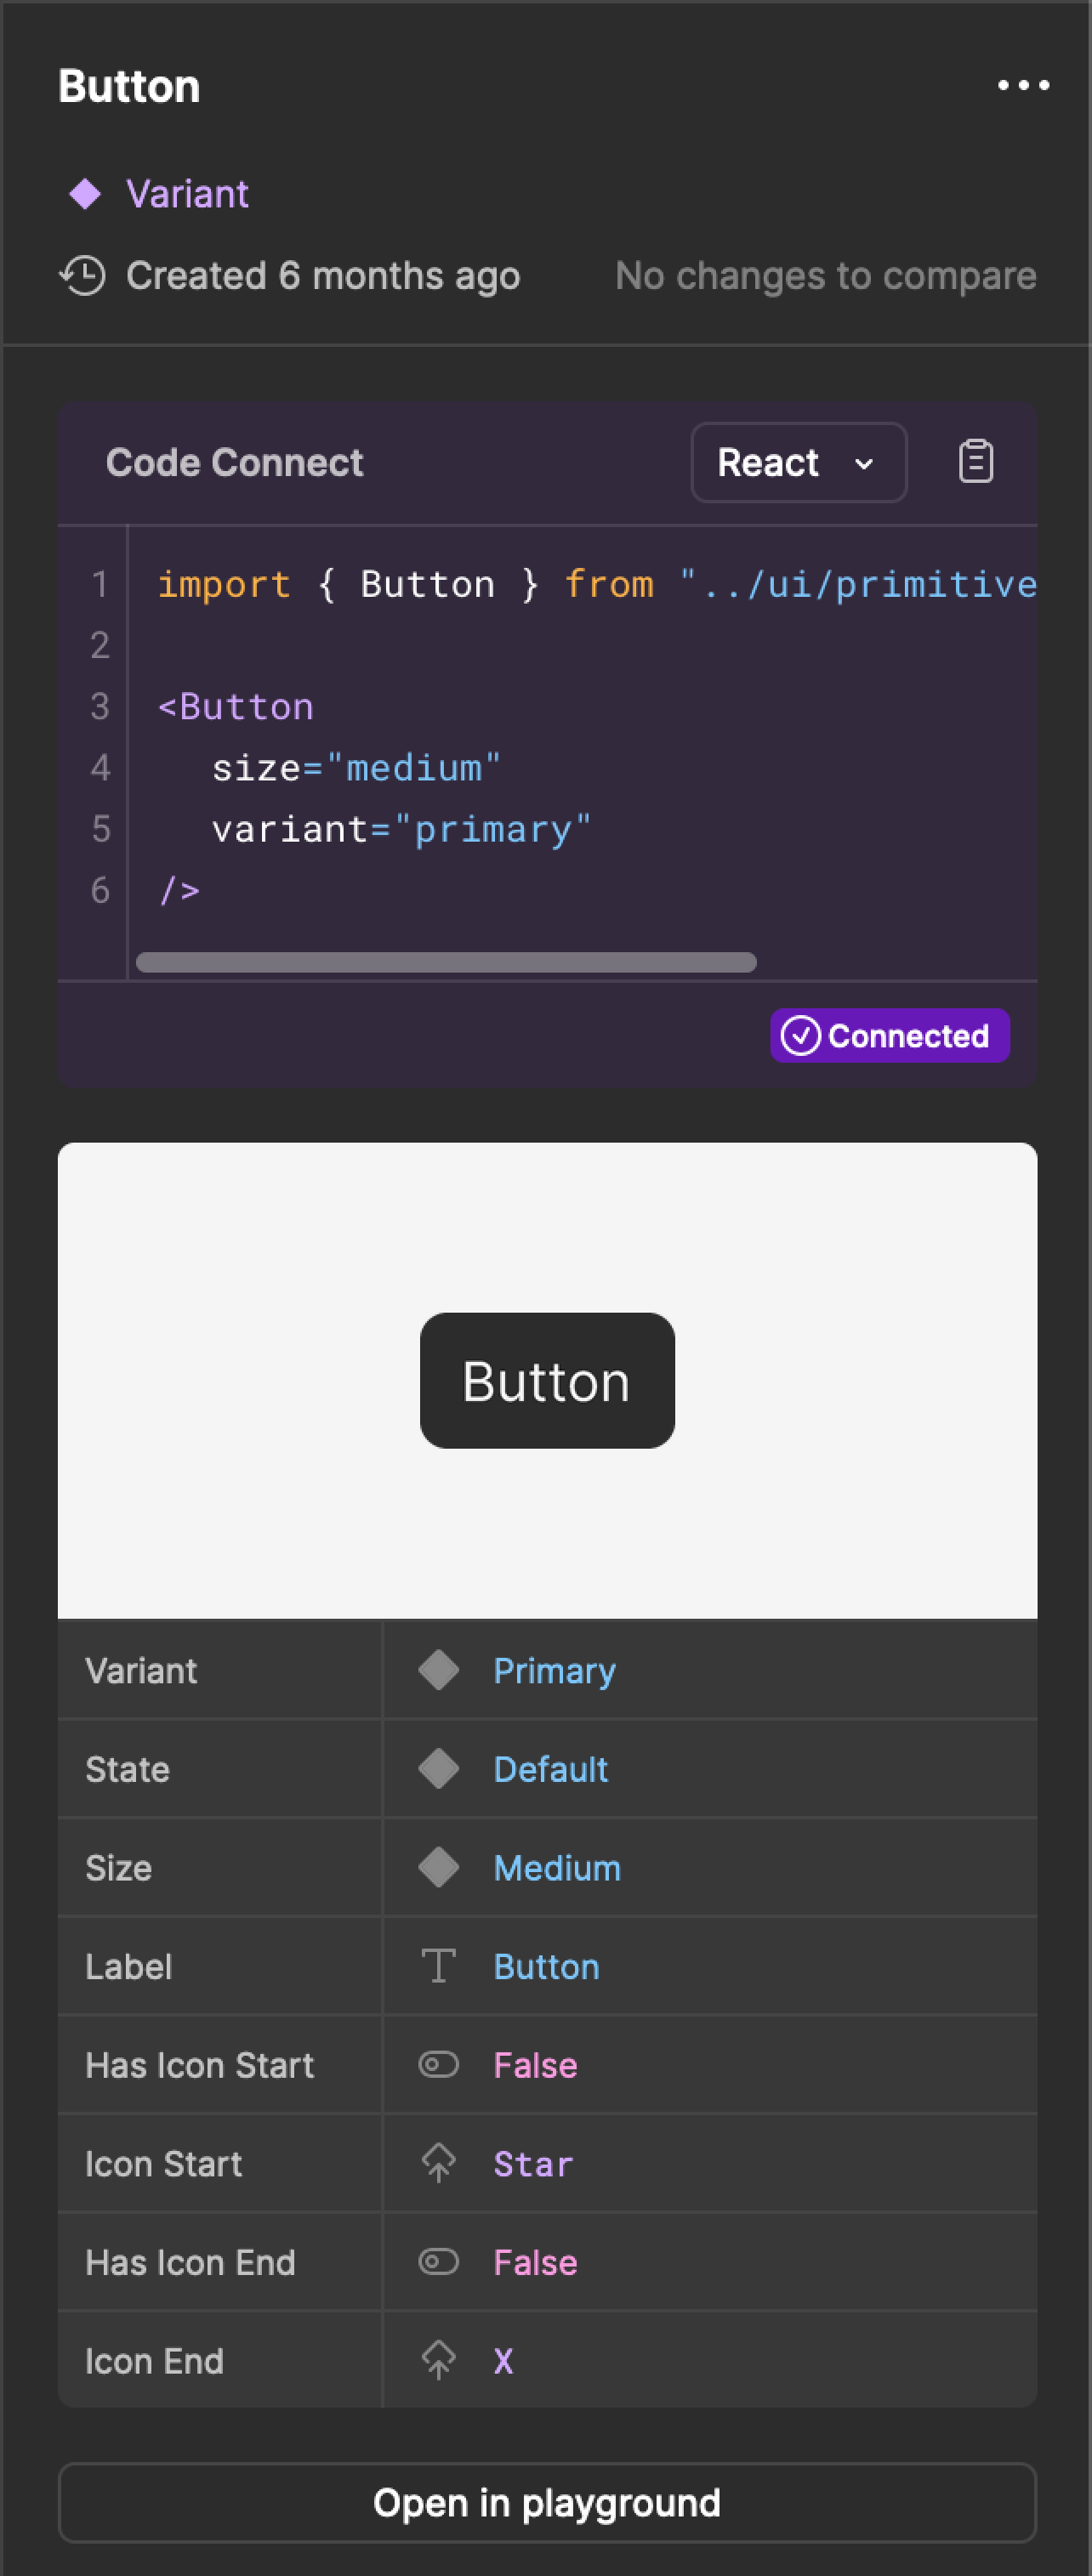
In the toolbar, click
 Dev Mode. The code snippet from Code Connect appears in the Inspect panel in the right sidebar.
Unpublish Code Connect files
If there are any issues with your mappings or you need to detach a component for any reason, you can unpublish a Code Connect file. To unpublish a file, use:
npx figma connect unpublish --node=NODE_URL --label=LABEL
Where NODE_URL is the URL of a specific node in your design system file, and label is the type to unpublish, e.g. "React" or "Vue".
Important: If you don’t specify a node URL, Code Connect will unpublish all of your components defined in your Code Connect files directory. If you ever have questions about other configurations that can be run, use the --help flag to list all the available flags.
Next Steps
Now that you’ve published your first template file, here are some things to explore:
- Writing template files →: Learn the full template API, including nested components, conditional rendering, and more.
- Template API reference →: Complete reference for all available methods and types.
- Configuration →: Advanced configuration options for your
figma.config.json. - Framework-specific APIs: Code Connect also supports framework-specific integrations for React (and React Native), HTML/Web Components, SwiftUI, and Jetpack Compose.